Juncheng Qian


Auto-calibration System
Nov 2018 - May 2019
Client: Sensata Technologies
Collaborators: Kyle Krenzel, Miguel Gallego
Faculty Adviser: William W. Hauser
For my mechanical engineering capstone, our team was tasked by Sensata to design and manufacture an automated calibration tool that will replace the current manual calibration of a circuit breaker component. Our solution is an automated system that utilizes a motor-driven u-shaped tool and an Arduino-connected drop gauge to improve calibration accuracy and minimize dependence on operator knowledge.
I promise I didn't try to take away the operator's job;
I heard that she is retiring anyway.
Background
Sensata Technologies seeks an automated calibration tool for a bimetallic component on aircraft circuit breakers. Circuit breakers are widely used on military and commercial aircrafts for safety purpose. The critical component of a circuit breaker is a U-Shaped bimetallic component. When the current overflows, the bimetallic component heats up and bends, which trips the breaker and creates an open circuit. The curvature of the bimetallic component determines the triggering temperature of the circuit breaker. Currently, the curvature is calibrated manually at Sensata, and the process is inefficient and dependent on the operator’s skills. Sensata urgently need an automatic replacement process, since many operators are retiring next year.

Primary objective:
-
To ensure the calibration of the curvature of the U-shaped bimetallic component in under 15 seconds.
Secondary objectives:
-
The development of a clear, easy to use Interface for the operator to calibrate the “gap set” distance.
-
Capability to choose different components, settings
Spring-back Calculation


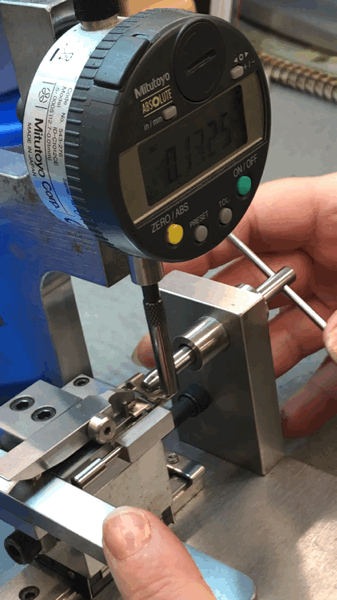
Final Prototype


1. Load component
2. Push component to U-tool

4. Motor and drop gauge work together to calibrate the component. Automation!

3. Select Components on Interface

5. Interface shows result

